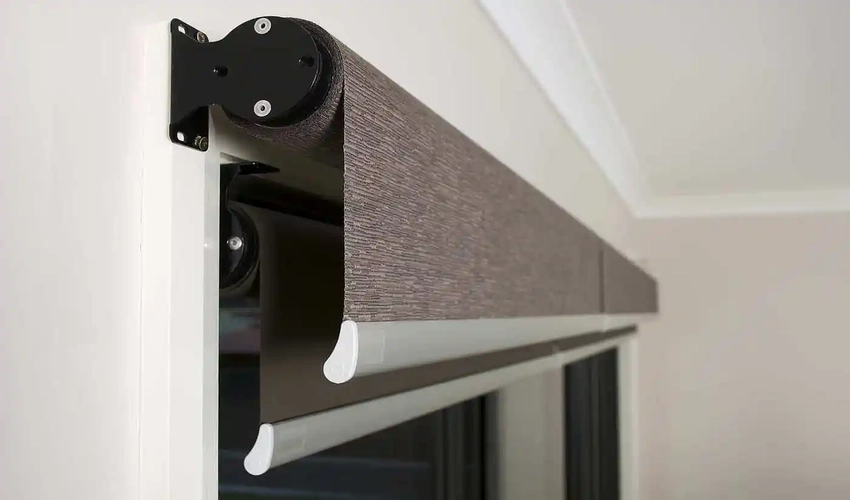

Installing window blinds does not always require screws, wall plugs, or a power drill. No drill blinds offer a practical option for renters, temporary homes, and anyone who wants to avoid making holes in a wall or window frame.
Several installation methods are available, including adhesive blind brackets, clip-on blind brackets, tension blinds, and magnetic blinds. The right option depends on your window design, blind type, weight, and mounting surface.
This guide explains how to install window blinds without drilling and how to choose a suitable drill-free mounting method.
Why Install Window Blinds Without Drilling?
Traditional window blind installation often involves drilling into the wall, ceiling, or window frame. This works well for permanent installations, but it does not suit every property.
Window blinds without screws offer several practical benefits:
- No drilling holes into walls or window frames
- Less mess during installation
- Faster installation for suitable blinds
- Easier removal when moving home
- Suitable for many rental properties
- Useful for temporary window blinds
- No power tools required for many systems
No-drill installation also helps when you want to avoid altering an existing window frame.
Types of No Drill Blinds
Different drill-free blinds use different mounting systems. Choose the method based on your window and the blind you plan to install.
Adhesive Blind Brackets
Adhesive blind brackets attach to a suitable surface using adhesive pads or mounting tape instead of screws. They work with selected lightweight blinds and compatible surfaces.
Before installation:
- Check the manufacturer’s weight limit
- Confirm the adhesive suits your surface
- Clean the mounting area
- Follow the recommended setting time
Adhesive window blinds offer a removable option, although removal still requires care to avoid damaging delicate surfaces.
Clip-On Blind Brackets
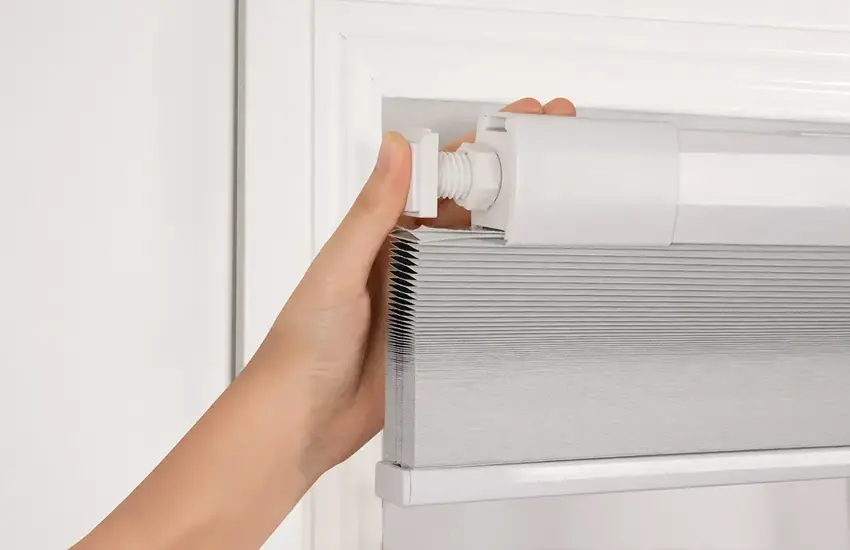
Clip-on blind brackets attach directly to a compatible window frame. They do not require screws or holes. These brackets work well with certain window designs where the frame provides enough space for the clips.
Check the bracket design before purchasing. Not every window frame supports clip-on installation.
Tension Blinds
Tension blinds use pressure between the sides of a window recess to hold the blind in position.
This method works mainly with suitable inside mount blinds.
Tension systems offer a useful option when you want temporary window blinds without adhesive or screws.
Magnetic Blinds
Magnetic blinds use magnetic mounting points instead of traditional screws.
They require a compatible surface, so check your window frame before choosing this system.
Magnetic installation suits situations where you want removable blinds and the window construction supports magnetic attachment.
How to Install Window Blinds Without Drilling
The exact process varies between products. Always follow the manufacturer’s installation instructions first.
Step 1: Measure the Window
Accurate measurements help you choose the correct blind size and mounting method. For inside mount blinds, measure inside the window recess.
Record:
- Width
- Height
- Recess depth
- Available mounting space
Take width measurements at more than one point. Some window openings vary slightly from top to bottom.
For outside mount blinds, measure the area around the window where you want the blind to sit.
Step 2: Choose the Mounting Method
Select a drill-free system based on your window and blind.
Consider:
- Adhesive blind brackets for compatible lightweight blinds
- Clip-on blind brackets for suitable window frames
- Tension blinds for compatible recessed windows
- Magnetic blinds for suitable metal surfaces
Also check the blind’s weight and operating mechanism.
A mounting system needs to support the blind during normal use. Do not choose a bracket solely because it avoids drilling.
Step 3: Clean the Surface
Adhesive systems need a clean mounting surface.
Remove:
- Dust
- Grease
- Dirt
- Residue
- Loose particles
Allow the surface to dry before attaching the adhesive brackets.
For clip-on systems, clean the window frame and check for anything that prevents the bracket from sitting correctly.
Step 4: Mark the Bracket Positions
Hold the blind in position before attaching the brackets.
Check that:
- The blind sits level
- Both sides have enough mounting space
- The blind does not obstruct the window handle
- The roller or operating mechanism has enough clearance
- The blind sits in the intended inside or outside mount position
Mark the bracket locations according to the product instructions.
This step helps prevent uneven installation.
Step 5: Attach the Brackets
Attach the blind mounting brackets using the selected drill-free method.
For adhesive brackets:
- Remove the protective backing.
- Position the bracket carefully.
- Press it firmly against the prepared surface.
- Follow the manufacturer’s recommended setting time.
For clip-on brackets:
- Position the bracket on the compatible window frame.
- Secure the clip according to the instructions.
- Check that it sits firmly before attaching the blind.
For tension blinds, position the system evenly inside the window recess and adjust the tension according to the manufacturer’s instructions.
Step 6: Attach the Blind
Once the brackets are secure, install the blind.
Follow the product instructions for connecting the blind to the mounting brackets.
Check both sides before operating it.
For roller blinds without drilling, test the roller several times. Raise and lower the blind gently and check whether the brackets remain firmly in place.
Step 7: Test the Blind
Operate the blind several times after installation.
Check for:
- Uneven movement
- Loose brackets
- Excessive movement
- Contact with the window frame
- Problems with the operating chain or cord
If the mounting system shifts, stop using the blind and check the installation instructions.
Are No Drill Blinds Suitable for Rental Properties?
Renter-friendly blinds offer a practical option when you want to avoid permanent holes in walls or window frames.
They suit:
- Rental apartments
- Temporary accommodation
- Student housing
- Short-term properties
- Home offices
- Rooms where permanent fixtures are not preferred
Before installing adhesive or clip-on blinds, check your tenancy agreement and property rules.
A no-drill system does not always guarantee a completely mark-free removal. Adhesive products still need careful removal from painted or delicate surfaces.
Adhesive vs Clip-On Blind Brackets
Both systems avoid traditional screws, but they work differently.
Adhesive Brackets
Adhesive brackets:
- Attach to a suitable surface
- Work with selected lightweight blinds
- Require surface preparation
- Offer a removable installation method
Clip-On Brackets
Clip-on brackets:
- Attach to compatible window frames
- Do not require adhesive
- Need a suitable frame design
- Offer easy removal when properly fitted
Choose the system based on your window rather than the installation method alone.
Can You Install Roller Blinds Without Drilling?
Yes, selected roller blinds support drill-free installation.
Depending on the product, you might use:
- Adhesive blind brackets
- Clip-on brackets
- Tension systems
- Other manufacturer-approved mounting systems
Check the blind’s installation requirements before purchasing. The blind’s size and weight also affect which mounting system suits the installation.
If you are considering roller blinds for your home, see Roller Blinds for more options.
What About Blackout Blinds Without Drilling?
Blackout blinds need careful positioning because light often enters through gaps around the blind.
When choosing a drill-free blackout system, check:
- Blind width
- Window recess size
- Side gaps
- Mounting method
- Blind weight
- Available installation space
A suitable blackout blind gives you better control over incoming light when the blind covers the required window area.
For more options, see Blackout Blinds.
Inside Mount vs Outside Mount Blinds
Your mounting position affects the installation process.
Inside Mount Blinds
Inside mount blinds sit within the window recess.
They work well when:
- The recess has enough depth
- The window opening provides suitable mounting space
- You want the blind contained within the frame
Tension blinds often suit this type of installation when the window design supports them.
Outside Mount Blinds
Outside mount blinds sit above or around the window opening.
They suit situations where:
- The recess does not provide enough space
- You need broader window coverage
- The blind needs to sit outside the window frame
Check the mounting requirements before selecting an outside mount drill-free system.
How to Choose the Right No Drill Blind
Consider these factors before buying:
- Window frame material
- Window measurements
- Recess depth
- Blind size
- Blind weight
- Mounting surface
- Inside or outside mounting
- Adhesive compatibility
- Clip compatibility
- Required privacy level
- Light control requirements
- Temporary or long-term use
If you need help selecting blinds for your property, see Blinds Dubai.
For automated operation, explore Motorized Blinds Dubai. Roman styles offer another option for suitable windows. See Roman Blinds for more information.
How to Remove Removable Blinds
The removal process depends on the mounting system.
Adhesive Blinds
Follow the adhesive manufacturer’s removal instructions. Remove the brackets carefully instead of pulling them away aggressively.
Clip-On Blinds
Release the clips according to the product instructions. Remove the blind before removing the brackets.
Tension Blinds
Release the tension gradually and remove the system from the window recess.
Magnetic Blinds
Separate the magnetic mounting points carefully and remove the blind.
Taking care during removal helps reduce the risk of surface damage.
Tips for Successful Drill-Free Blinds Installation
Keep these points in mind:
- Measure the window accurately before ordering
- Check the blind weight and bracket capacity
- Use a mounting system approved for your blind
- Clean surfaces before attaching adhesive brackets
- Check bracket alignment before fixing them
- Allow adhesive systems to set for the recommended time
- Test the blind gently after installation
- Check rental rules before installing adhesive products
- Avoid modifying the blind or bracket unless the manufacturer permits it
When Should You Use Professional Window Blind Installation?
DIY installation works well for many simple drill-free systems. Professional window blind installation makes sense when your windows have unusual dimensions, difficult access, or a more complex blind system.
Professional installation also helps when you need several blinds installed across different rooms and want consistent alignment.
For motorized blinds, professional installation helps ensure the mounting and operating components work together correctly.
Final Thoughts
Installing window blinds without drilling gives you several options when you want to avoid permanent holes. Adhesive blind brackets, clip-on blind brackets, tension blinds, and magnetic blinds each suit different window designs.
Start by measuring your window. Then check the blind’s weight, mounting requirements, and frame compatibility. Choose a drill-free system designed for the blind rather than relying on a generic adhesive or bracket.
With the right combination of blind and mounting method, you get a practical window covering while keeping installation simple and removable.